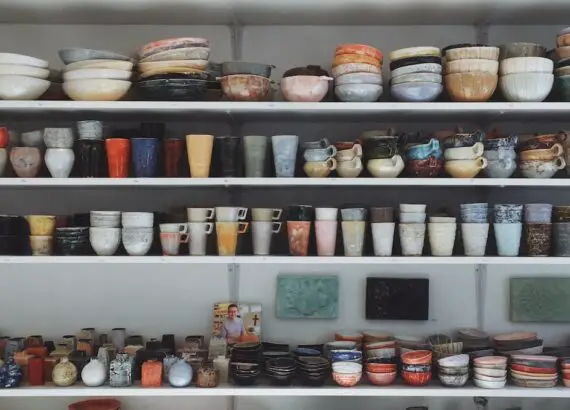
What Are The 7 Stages of Clay? An Ultimate Guide
As you embark on this journey of pottery, it is important that you first have an understanding of the stages. The stages help you to understand the changes your clay goes through as it moves from boring to beautiful.
What’s more, knowing and understanding the stages guarantees that you’re not jumping into uncharted territory with both feet. This knowledge arms you with the know-how of how to transform your clay into your visualized expectation.
Take this journey and be enlightened on how much (or how little) is required of you as the clay changes.
Whether earthenware, stoneware, porcelain, fire clay, or ball clay, all clay must pass through certain stages during preparation.
Having proper knowledge of the different stages is, perhaps, the second most important thing, after choosing your type of clay. Whether you’re a professional potter, or you’re just beginning the journey, here are a few things you should know.
- When choosing a project to embark on, your best bet is to allocate ample time to the process. Ideally, to complete the production of one or more potteries at the same time takes almost two weeks. Knowing that should give you a valid timeline to work with.
- Within this timeline, the clay goes into a lot of changes for it to end up as the finished product. If anything, it feels safer to know what your clay should look and feel like every step of the way. What’s more, it gives you an idea of what to do and how to adjust if something comes up.
Table of Contents
Step 1: The Dry Clay Stage
Say you just received your clay shipment, and you’re excited and get to unpacking. That dry, glorious clay package has more potential than its appearance speaks of. If you’re wondering why it’s so dry and lumpy, don’t worry, it’s completely normal.
At this first stage, clay comes in dried packages because wet clay is heavier and more problematic to ship. Not to mention messy.
If you’re planning on getting your clay directly from the soil, this stage may not apply. Unless you’re going to save some for later. In that case, after filtering the sand out of the clay and molding it into a ball, dry the clay out.
You could decide to leave it in a ball, or break it up into smaller clumps. Breaking it up means it dries out faster, though.
If you’re wondering about the shelf life of dry clay, there’s no need to worry. Dry clay can keep for thousands of years. Its structure makes it virtually impervious to changes in temperature, climate, and weather conditions.
To make clay workable at this stage, break the lumps into even smaller pieces and add some water. Alternatively, you can put the broken pieces in a bucket of water and let them melt and precipitate at the bottom. When you’re ready to put the clay to use, drain off the excess water and scoop out the clay.
Another alternative would be to wrap the pieces up in a damp towel and add water routinely.
It is at this stage some potters modify the clay by adding colorants and compounds like quartz, silicon, silt, etc.
Step 2: The Slip Stage
Once the clay has been hydrated enough, it moves onto the second stage, known as the slip stage. At this stage, the clay is slightly runny and in a paste form.
The texture of the clay at this point is completely dependent on the potter and the function of the clay.
For example, this type of clay is excellent for:
- Joining pieces of pottery together, or adding accessory pieces. For this purpose, the clay is mixed with water to about the same consistency as mayonnaise, before it is applied. In pottery, this process is called “slipping”. The site for the joining is prepared by scratching lines onto the pottery, then applying the slip.
- Decorating your pottery. When mixed into perfect consistency (not too thick or too runny), slip clay works great for decorating. Fill a piping bag or a bag with a pointed tip with enough slip clay and get creative. To spruce things up, you could throw in or experiment with different colors to give it variety.
- Creating molds and models (also known as slip casting). In a process similar to making a cast, slip clay can be used to create molds. For example, a dentist wants to have a handy model of human dentition. What does he do? He grabs a mold that meets all his requirements and prepares the slip clay.
Take note, though, that slip clay for molds work best when it is light and a bit runny.
Once you have attained the right consistency of slip clay (think sponge cake batter), prepare the mold. In other words, dust the mold, remove any dirt that may be hidden in the crevices.
Also, you could roll up a ball of leftover plastic clay and run it around the inside of the mold. If there is any dirt, the clay can pick it up along the way. Be sure to reach the corners too for a thorough job.
After preparing the mold and the slip clay, pour the clay into the mold and let it set. Depending on the thickness of your slip, you may have to wait 24 hours for it to be fully set. Once the clay has been set, retrieve it from the mold. You could turn it upside down and give it a little tap to speed things up a bit.
As a precautionary measure, some slip casters spray a thin layer of oil inside the mold before pouring the slip. There might be no need for this part, but it’s better to err on the side of caution.
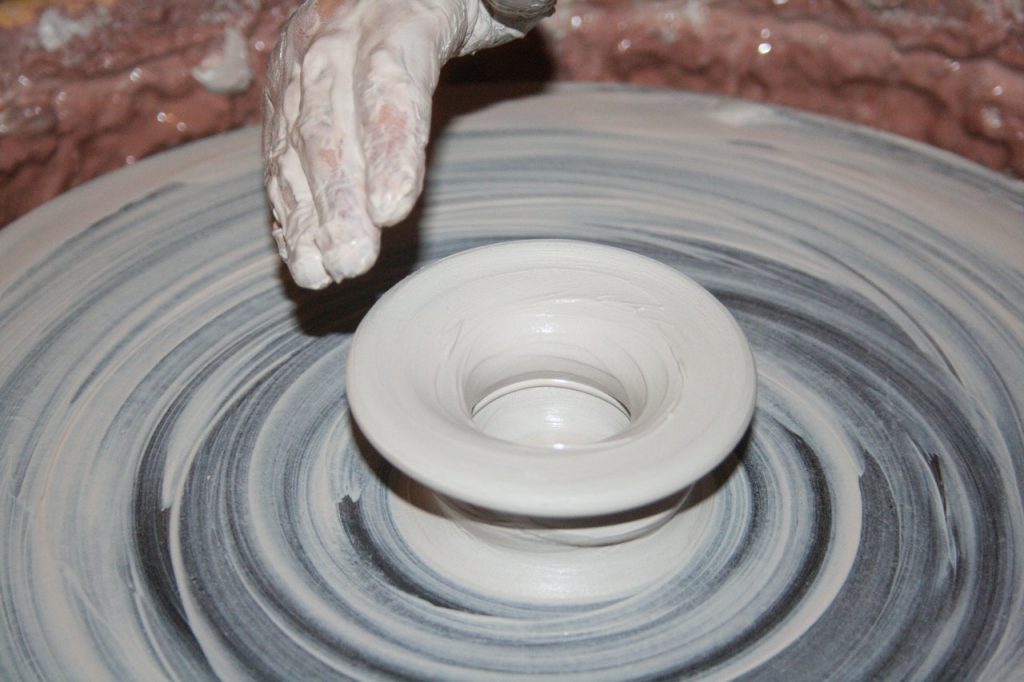
Step 3: The Plastic Stage
At this stage, the clay is most malleable and easy to manipulate. At this stage where the clay is most workable, it implies that there is a balance in the moisture content.
At this stage, the clay should feel smooth, soft, and easy to manipulate without breaking, so look out and adjust. If at this stage your clay is hard to bend, or breaks easily, it means you need just a bit more water.
If, on the other hand, it’s too runny or doesn’t hold your desired shape, you have two options:
- add some ball clay to thicken it up a bit. Mix it in until you get the desired consistency, or
- leave it out to dry out a bit, and come back later to adjust it. This method is comparatively easier if you don’t have ball clay, or if you think it’ll mess with your pottery.
This stage takes the lead on every other stage, according to potters, and the reason is simple. Potteries formed at this stage usually retain their shape and form for a long time.
What’s more, they don’t crack or flake when left out to dry, unlike potteries formed from clay in other stages.
When clay is too dry at this stage, it means it needs more moisture. Add some water and set it aside, or dip your hands in water as you work the clay.
When the clay is too runny at this stage, it means that there’s too much moisture, and it needs to dry out a bit more.
Step 4: The Leather Hard Clay Stage
At this stage, the clay has hardened a bit, and now has a soft, leathery feel, hence the name. At this stage, the pottery is perfect for trimming and transferring from the wheel.
If all goes well, the clay has taken on the shape and form you have in mind -rough edges notwithstanding. Go right ahead and smooth out those rough edges and dull sharp points.
One mistake some people make at this point is getting too excited and letting the clay dry out. For any beginner potter, this could be discouraging, but don’t worry. Simply grab a plastic wrap and cover the pottery so it doesn’t dry out.
If the clay is too soft and presents problems during the trimming process, wait it out. If, on the other hand, it’s too hard, you could use a wet towel or sponge to smoothen it.
Alternatively, you could use some sandpaper to smoothen out the edges.
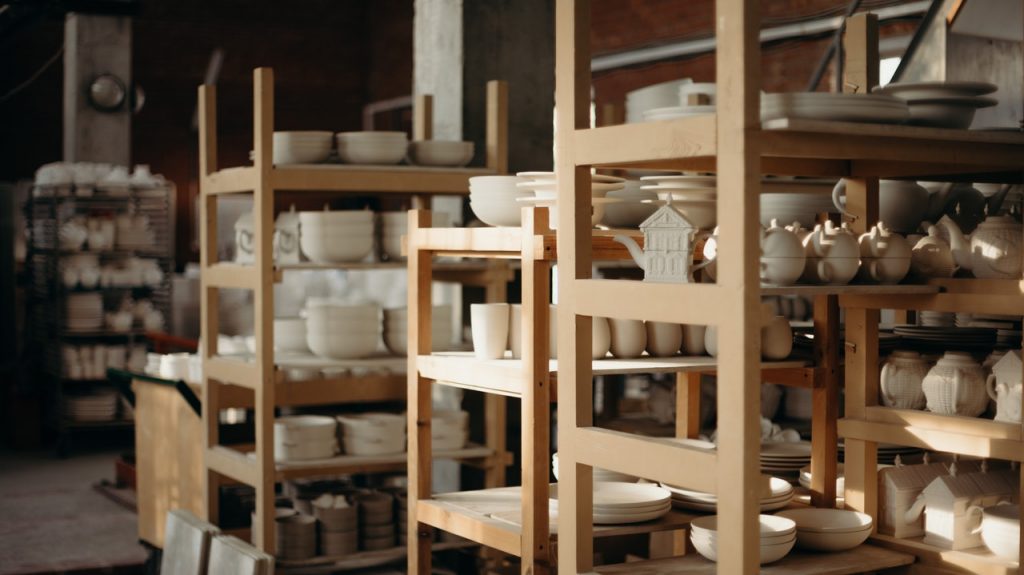
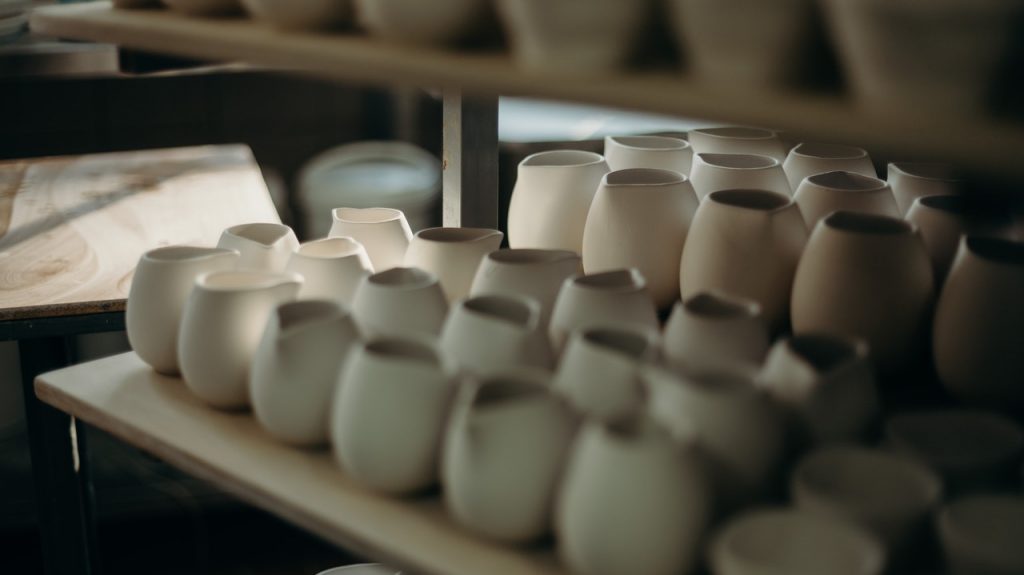
Step 5: The Bone Dry Stage
After the leather hard stage, the trimmed clay is placed in a clean place where there’s plenty of sunlight.
Depending on the type of pottery you’re making, the drying process takes between 8 and 14 days.
Besides the thickness of the vessel, other factors should be taken into consideration when it gets to this stage. For example, if you stay in a cold environment, you’ll have to find an alternative for drying it in the sun. Here’s a foolproof alternative: a process known as “candling”. It means setting the temperature on your kiln very low (below 100°C) and popping your potteries in.
Alternatively, turn down the heat on your oven drastically, and center your potteries inside. In both cases, you have to leave them in the kiln for at least 8 hours. When the air coming out of the peephole is less dense, it means most of the moisture has evaporated.
Some potters insist that their best designs come when they apply the underglaze and glaze at this stage. Applying glaze at this stage is possible if you have a large area for sun-drying or a big enough kiln. Otherwise, you can hold off on applying a layer of glaze till the next stage.
Holding off on the glazing means there won’t be woeful tales of one glazing bleeding into the next pottery.
There are a few caveats to consider when using clay that is in the bone dry stage. They are:
- Moving the clay around too much can cause irreparable damage to it. At this stage, the clay is most fragile, and errors gotten at this point are mostly irreversible. A contributing factor is that the majority of the moisture has been removed, so one has to be very careful.
- Seeing as bone dry clay is fundamentally hardened mud, it goes without saying that it doesn’t need water around it.
- If the clay still has most of its water content at this point, don’t get impatient and pop it in the kiln. If you do that, when the temperature rises, it will cause the water molecules to be broken down. This changes it from liquid to steam. The pockets where the water escaped from will collapse to compensate for the structural change. This, in turn, will either cause the clay to explode in the kiln, or leave you with misshapen pottery.
Stage 6: The Bisqueware Stage (The Greenware Stage)
After the pottery has been properly sun-dried, it is ready to be baked in the kiln. At this stage, the pottery should feel dry to the touch. Also, if you rub your hand along it, it should come off with a layer of dust, without leaving smudges.
The bisqueware stage is used to refer to clay that has been baked once in a kiln.
On the occasion where the pottery was not allowed to dry out completely, the pottery may explode in the kiln.
After the pottery has been baked sufficiently at this stage (at about 950°C), it is referred to as a bisque. This is the best time to apply the glaze because the pottery is both hard and porous enough for it.
Like all the other stages, this stage also requires that you prepare the pottery. Simply use a soft brush or a cloth to lightly dust the pottery. This will ensure that there are no ash deposits, fingerprints, smudges, or dirt around it. As one can accurately predict, this process requires a great deal of care, we don’t want it slipping and breaking.
If you’re working with earthenware clay and want to create terra cotta, you can decide to skip out on the glazing. Otherwise, follow these steps:
1. Applying The Underglaze
For this process, a single color is often recommended, unless you want something different or scenic. It calls for the application of a thin layer of glaze as a way of preparing the pottery for the next layer.
When applying it, be sure to allow the glaze to dry out completely, and try to avoid smudging it. If you’re applying more than one layer of glaze, check to make sure that the first layer has dried off first. Depending on how you apply it, the underglaze is a crucial step in vitrifying your pottery.
If you applied underglaze at the bone dry stage, you can apply another layer in case you missed a spot.
2. Applying The Glaze and Embellishments
After the underglaze has dried completely, it is ready to be glazed and embellished. Every potter is at liberty to go wild with the colors they like, including you. You can choose bold colors and designs, patterns in warm colors, paintings, etc.
This stage is perfect for embellishments involving gold and silver leaf plates, adding accessories and motifs, etc.
Although this stage can be fun, be warned, though. It gets messy. Sometimes, the glaze might be too light that it runs off and drips and may stain other things. In that case, have a wire rack ready with a napkin underneath it to catch any drips. It’ll save you a lot of stress.
If, on the other hand, the glaze is too thick, there might be a problem getting it around the pottery entirely. On the one hand, it may be thicker on one side and lighter on the others. On the other hand, it may be too thick that it does not completely cover the pottery.
3. Applying The Overglaze
When you’re satisfied with your choice of glazing, and you have left it to dry, apply a coat of clear glaze. This layer is to give the pottery a finish of evenness, as well as a subtle sheen.
This step is completely optional, so you can go right ahead and skip it altogether. Your choice.
If you decide to apply the overglaze, set it on your kiln rack so it can dry up without smudging.
Stage 7: The Final Firing Stage (Glaze Firing Stage)
This is the last stage your clay goes through (except, of course, you’re creating terra cotta). Once pottery has been fired at the bisqueware stage, firing it once more further seals the holes in the vessel.
This step is very vital in the preparation of vessels intended to hold water or as functional utensils.
Depending on the maturation temperature of your glaze, firing it melts the glaze into the clay body. This melting action fills up whatever holes may have been left after the first firing at the bisqueware stage. In other words, it makes your pottery waterproof.
Before firing your glaze -before applying the glaze even, read the labels and note the recommended temperatures. Some glazes, when fired at temperatures higher than their normal firing temperature, will melt and mess up your pottery.
In terms of firing temperature, there is a standard measurement used to represent it for both the clay and glaze. This measurement is referred to as “Cones”.
Table 1 below is a representation of the approximate cone temperature ranges for firing pottery.
| Temperature Range | Cone Range | Temperature (°C) |
| Very Low Range | 022 – 013 | 605 – 850 °C |
| Low Fire Range | 012 – 02 | 882 – 1120°C |
| Low Mid Range | 01 – 3 | 1110 – 1145 °C |
| Mid Fire Range | 4 – 7 | 1165-1210 °C |
| High Fire Range | 8 – 14 | 1260-1390 °C |
When talking about glaze firing, there are 4 main classifications as regards firing temperature. They are:
- Glazes that require high fire. This means that the optimum firing temperature for these types of glaze is between 1206°C and 1390°C. That is between Cones 8 and 14.
- Glazes that require medium firing. In other words, the optimum firing temperature lies between 1110°C and 1210°C, that is between Cones 7 and 01.
- Glazes that require low fire. These glazes should be fired between temperatures of 882°C and 1120°C, that is between Cones 012 and 02.
- Glazes that require very low fire. The optimum firing temperature for these types of glazes is between 605°C and 850°C. The cone measurement lies between 022 and 013.
Some Points To Note
1. When it comes to cone measurements, the “0” in front of each number represents a lower temperature. In other words, while 022 is a bigger number than 2, in Cone measurement, 2 is higher than 022.
2. The best stage for embossing your pottery is when it is in the leather hard stage. At this stage, although the clay is still somewhat fragile, it is flexible enough to allow for embossing, carving, etc. Be careful, though. Although it is sturdy enough to accommodate embossing and stamping, it can be misshapen if too much pressure is applied.
3. When choosing a glaze, please note that a lot more goes into the process than just combining colors. The best kind of glaze to pick is one that corresponds with the firing temperature of your clay.
If you’re unsure what that means, look at the label your clay and glaze came in and note the temperature. If the Cone ranges match, all is in order.
However, if your clay is homemade, differentiating the type of clay it is is half the work. Once you’ve confirmed what type of clay you’re working with, look up the Cone range and find suitable glazes.
Conclusion
When all has been said and done, remember that the process of creating pottery is both long and fulfilling. Creating each piece by hand and watching them change from slabs of clay into finished pottery, can be therapeutic. Enjoy the journey and trust the process.